If you’ve
ever been to a “Mongolian stir-fry” or “Mongolian barbecue” restaurant,
actually you haven’t. There’s no such thing. Stir-fries and barbecues are as
authentic to Mongolian cuisine as tofu tacos are to Mexican.
No offense
to chain restaurants or California, but when you want to prepare something
native to a certain culture or locale in your own kitchen, make the recipe as
real as possible—even from afar.
What I’ve
read, heard, studied, learned about true Mongolian cuisine is this:
- It isn’t
Chinese.
- It is very
meat-based, particularly fatty mutton and beef.
- Fresh
vegetables don’t weigh heavily in homemade recipes. (It’s cold there.)
- Onions,
garlic, and cabbage appear regularly.
- Good bread
and other flour products are staples. Thus, dumplings and filled pockets.
“Khuushuur”
are only one of a few types of Mongolian pockets, distinguished mostly by shape
and preparation (others are steamed or boiled). Khuushuur are circles of dough filled and pinched into half-moon
shapes (think empanadas) then fried. And the filling is simple: ground mutton
or beef mixed with finely chopped onion and garlic, sometimes cabbage.
Spices are minimal: salt, pepper, sometimes caraway.
Khuushuur are
often eaten simply by themselves, but ketchup is a common accompaniment. For
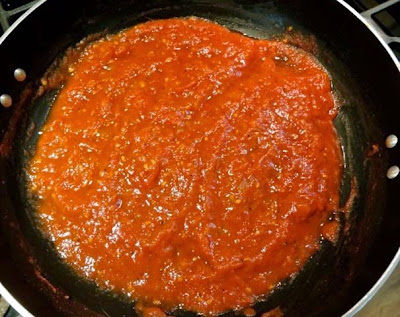
this recipe, I decided to make my own ketchup, using fresh tomatoes and a few
other ingredients for a little spicy, sweet condiment to dunk the khuushuur
into.
The bottom
line for this Mongolian-style dinner is this: simple, fresh, and real. (At
least as real as you can get stateside.)
Makes 16
filled pockets
Ingredients
For the Ketchup
- 1 lb large
tomatoes, peeled and coarsely chopped
- 3 tbsp
tomato paste
- 1 tbsp
white sugar
- 1 tbsp
cider vinegar
- 1/4 tsp ground
cinnamon
- 1/4 tsp cayenne
powder
- sea salt
 |
| Tomatoes for the Ketchup |
 |
| Chopped Tomatoes |
For the Khuushuur
- 1 1/2 cups
flour, plus more for dusting and as needed
- 1/2 tsp
fine salt
- 1 cup
water
- 2/3 lb
ground chuck (or mutton)
- 2 garlic
cloves, finely chopped
- 1 very small
onion, finely chopped
- 1/2 cup
finely chopped cabbage
- 1/2 tsp
caraway seeds, lightly crushed
- sea salt
- freshly
ground black pepper
- peanut oil
(enough to measure about 1/4-inch deep in a 12-inch skillet)
Preparation
For the Ketchup
- Place all
the ingredients in a saucepan over medium heat and bring to a light simmer.
Reduce the heat to low and cook slowly until the tomatoes break down and the
mixture is fairly thick, 20-25 minutes. Remove from the heat and cool
completely.
 |
| Tomato Mixture Beginning to Cook |
 |
| Cooked Ketchup |
- Place the
mixture in a food processor and process until pureed. Taste for salt, and stir
in more if needed. Place the ketchup in a bowl, cover, and refrigerate at least
1 hour. Use right away, or keep refrigerated 2-3 days.
 |
| Homemade Fresh-Tomato Ketchup |
For the Khuushuur
- Combine the
flour and salt in a bowl. Gradually add the water, mixing to form a pliable dough.
(Add a little more flour if the dough is too sticky.) Form into a ball and
cover with a bowl. Let stand 30 minutes.
 |
| Dough Ready to Rest |
- While the
dough rests, place the meat, garlic, onion, cabbage, and caraway in a bowl and
season with salt and pepper. Combine well.
 |
| Ground Beef Mixture |
- Cut the
rested dough in half. (Keep one half covered or wrapped while you work with the
first half.) On a floured surface, roll out the dough very thinly, to about 1/10-inch
thickness. Press a 4-1/4-inch-diameter bowl or saucer into the dough and run a
sharp knife around the edge to cut out a circle.
- Place the
circle on a sheet of wax paper and continue with the remaining dough,
re-rolling the leftover dough until there’s not enough to place the saucer on.
(Stack the dough circles between sheets of wax paper to prevent sticking or
drying.)
Note: If you are making the circles a
day ahead, wrap the wax paper edges over them and place in a freezer bag.
Freeze overnight and thaw to room temperature before proceeding.
 |
| Thinly Rolled Dough |
 |
| Dough Cut into Circles |
 |
| Dough Circles Layered on Sheets of Wax Paper |
- Remove the
wax paper 1 sheet at a time, and spread 1/16 of the meat mixture (about 1-1/2
tablespoons) over 1 half of the dough circle, leaving enough edge for folding.
Fold the other half of the circle over the filling and pinch 1 edge closed.
Gather a tiny piece of the dough next to the closed edge and crimp it closed.
Continue gathering and crimping until you reach the other side of the half
circle.
Note: Don’t worry if the crimped edges
are oddly shaped (mine were!). Just seal them well and they’ll be just as
delicious as “pretty” ones.
 |
| Filling Spread onto the Dough |
 |
| Filled Pocket |
- Preheat the
oven to its lowest temperature (to keep the finished kuushuur warm while the
rest fry).
- Heat a
12-inch skillet over medium-high heat and add enough oil to measure 1/4 inch.
(Test the heat by dropping a dot of dough into the oil. If it sizzles, you’re
ready.)
- Place half
of the kuushuur pockets in the oil and fry until the meat is cooked through and
the dough is golden and crispy, 5 minutes on the first side and about 3 minutes
on the second side.
- Remove the pockets
to a plate, letting excess oil drip off, and keep warm in the oven while frying
the other half.
 |
| Kuushuur Beginning to Fry |
 |
| Kuushuur after Turning |
To serve,
stack the filled pockets on a platter with the bowl of homemade ketchup. Serve hot.


+with+Homemade+Fresh-Tomato+Ketchup.jpg)


