This hearty vegetarian pie is loaded with the flavors of
summer—and plenty of cheese. Peppers, fresh corn, summer squash, scallions,
sweet tomatoes, mmmm. And when you add the cheesy, salty bite of asiago along
with creamy provolone and ricotta, you’ve got a rich, flavorful pie to
celebrate the season. You won’t miss the meat.
Tip: Removing the kernels from an ear of corn is
easy. Stand the ear in a shallow bowl and gently scrape down the sides just
beneath the kernels with a large, sharp knife. Take it slowly so that the
kernels land in the bowl, not on the walls.

For potpies that aren’t so vegetarian, check out Skillet Chicken Potpie with Fresh Herbs and Spinach and Smoked Salmon Pie.
Serves 4-6
Ingredients
- 1 14.1-oz package refrigerated piecrusts (2 crusts)
- 1 cup coarsely shredded asiago cheese
- 1/2 cup coarsely shredded provolone cheese
- 1/2 cup mixed, chopped red and green bell pepper (or all red)
- 2 scallions, thinly sliced
- fresh corn kernels from 1 large ear
- 1 cup ricotta cheese
- 1 very small zucchini, thinly sliced (1/8-inch)
- 1 very small yellow squash, thinly sliced (1/8-inch)
- 2 large roma tomatoes, thinly sliced (1/8-inch) and patted dry with paper towels
- sea salt
- freshly ground black pepper
- 1 egg white, whisked
 |
| Provolone, Asiago, and Ricotta |
 |
| Pie Vegetables |
 |
| Yellow Squash and Zucchini |
 |
| Pat tomato slices dry |
Preparation
Preheat the oven to 375°F.
Lightly oil a 10-inch cast-iron
skillet and place 1 piecrust in the bottom, pressing gently against the sides.
In a bowl, toss together the asiago and provolone cheeses.
In another bowl, combine the bell pepper, scallions, corn, and ricotta.
 |
| Ready to Fill |
 |
| Peppers, Scallions, and Corn |
 |
| Ricotta Added |
Scatter 1/3 of the asiago and provolone mixture over the
piecrust. Top with half the zucchini slices and half the yellow squash slices,
mixing vegetables throughout the layer. (Overlap as needed, but don't
double-stack. Save any remaining vegetables for later use.)
Spread half the ricotta mixture on top, then top with half
the tomato slices. Season with salt and pepper.
Scatter another 1/3 of the asiago and provolone mixture over
the tomatoes and repeat the layering, ending with the remaining 1/3 asiago and
provolone mixture on top.
Top with the remaining piecrust,
crimping the edges around the border. Make crisscross cuts in the top crust and
brush with egg white.
Bake 40 minutes, until the crust
is golden brown and the filling is bubbly.
 |
| Asiago and Provolone |
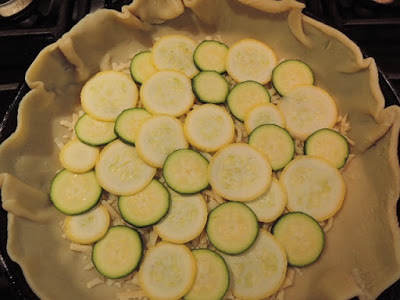 |
| Squash Layer |
 |
| Ricotta Mixture |
 |
| Tomato Layer |
 |
| Ready to Bake |
 |
| Baked Pie |
Transfer the skillet to a wire
rack and let rest 10 minutes before slicing.
 |
| Summer Vegetable and Cheese Pie |